


|
HELPFUL TIPS FOR FILE PREP |
|
Getting files ready to send to your printer is an important step. Regardless of the software programs used to create your artwork, there are some universal tips that can help ensure your files are prepared correctly for a commercial printer. In this issue, we cover 3 of the most common mistakes with digital file preparation and how to avoid them.
|
 Bleed
The term "bleed" refers to artwork that extends - or bleeds - past the edge of the paper. A printed piece that has full coverage of ink over the entire sheet is said to have a "full bleed." There is no visible edge, or border, of the paper with a full bleed.
When we produce jobs with bleeds, the image or ink color that bleeds is extended beyond the trim size. That excess image or ink color is then cut off during the bindery or finishing process - so no white edge of paper shows up.
You need to allow for bleeds in your digital files. We need a bleed allowance of .125". When working in your application file, make sure that the image extends .125" beyond the trim edge. If there's no bleed allowance in the file, it won't print correctly.
 Photoshop is a special sort of beast when it comes to creating bleeds, because there is no extra space to pull a bleed past the trim edge. You'll need to increase your canvas size (Photoshop Image Canvas Size) by an extra .25" for the width and .25" for the height. These adjustments give you that needed .125" bleed allowance. Say you're designing an 8 ½ x 11" brochure with bleeds in Photoshop. The canvas size needs to be 8.75" x 11.25" to get the proper bleed.
Keep in mind that even if you have your bleeds set up in your application file properly, you still need to make sure you include the bleeds when you export to PDF.
Finally, let your printer know that your design specifies a bleed. Bleeds
could potentially cost you more because they increase the amount of
paper needed.
|

|
Fonts Not Embedded/Missing Fonts Fonts in files are also tricky for several reasons. Free fonts available on the Internet may have licensing restrictions. So your source file might look fine - but the PDF generated for printing may not be able to properly display
such fonts.
Another problem to avoid is missing fonts. When sending your file to a printer, take care to include all fonts with your source files.
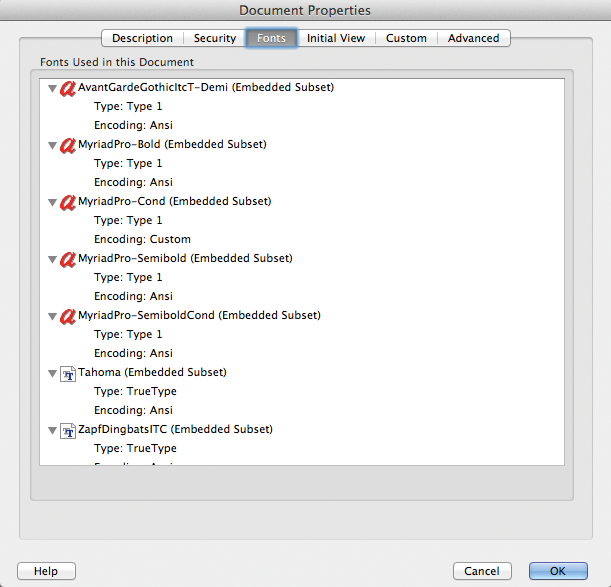 A third problem occurs when fonts aren't embedded in PDF files. When sending us a PDF file to be printed, fonts that look fine on your computer monitor might not translate at the printer's. An easy way to check this out is to open your PDF and go to Acrobat File Properties. This will show you all of the fonts used in your PDF. All fonts have to say either "(Embedded)" or "(Embedded Subset)". If either name is not listed on the file name, this means the font is not embedded, and this can delay or even stop the production process.
|
|
Image Resolution
Perhaps one of the trickiest issues in file prep is image size. Keep in mind that the highest quality and best-looking designs are always produced from the best original art that you can provide your printer. Here are good rules of thumbs to follow regarding image size.
Photos or line art scans can be either JPG or TIF format. Photo resolution reproduces best at 300 dpi (dots per inch) at final size. Line art should be scanned at 1100 - 1200 dpi at final size. Low-resolution photos causes pixilation when printed.
Vector graphics are made of paths, points, curves and angles generated by mathematical formulas. They're used to create anything from simple drawings to complex diagrams. These should be EPS format for your printer, and they're resolution independent unless they contain embedded images.
Avoid using Web images that you grab off the Internet for two reasons:
|

|
These tips will help make your files print-ready, reduce print production time, and contribute to getting you the printed results you expect. For a more comprehensive description of file prep tips, DOWNLOAD How to Submit Files (PDF) in the Resources section of our web site. And you're always welcome to call your Print-Tech representative with any question you may have on file preparation! |